
My WD My Passport completely disappeared from my laptop overnight. No clicking, no noise - just gone. Windows showed nothing in Disk Management. Sent it to MDrepairs and Joseph diagnosed a failed USB bridge board. He bypassed it entirely and recovered all 2TB of my wedding photos and videos. Absolute lifesaver.
- 4.6 319+ Google reviews
- 2M+ followers
- Serving all 50 states
Hard Drive Not Detected Data Recovery
Your hard drive just disappeared. One second it was there - the next, your computer acts like it does not exist. Do not panic, but do not keep trying. Every time you power cycle an undetected drive, swap cables, or reinstall drivers hoping for a miracle, you risk pushing a recoverable firmware or electronics issue into permanent mechanical damage.
MDrepairs in Lincroft, NJ specializes in recovering data from drives that are invisible to your computer - whether your internal SATA drive vanished from BIOS, your external USB drive stopped being recognized, or your SSD suddenly shows as "0 bytes." Every case starts with a $100 professional diagnostic to determine exactly why your drive is not being detected. We serve customers nationwide through our secure mail-in program - free insured shipping both ways. If your drive was already rejected by another shop, we routinely recover drives that other labs gave up on. No data, no charge.
- 4.6★Google Reviews
- 2M+Social Media Followers
- $100Flat Diagnostics
- 50 StatesNationwide Service
- In-HouseNever Outsourced
- No DataNo Charge
Follow Our Work
Professional Data Recovery Lab Backed By 2M+ Followers
MDrepairs is not a faceless corporate lab. Joseph Montanti, our founder and lead technician, shares real data recovery cases with over two million followers across YouTube, TikTok, and Instagram. When your hard drive stops being detected, you can watch us diagnose and recover drives with the exact same symptoms - PCB repairs, firmware fixes, head swaps on drives that were completely invisible to the computer. That level of transparency is why thousands of customers trust us with their irreplaceable data. Our Lincroft, NJ lab is equipped with a certified clean bench, PC-3000 systems, and a full donor drive inventory for fast turnaround on undetected drives.
Get a Free Quote- 1.1M+ YouTube Subscribers
- 400K+ TikTok Followers
- 290K+ Instagram Followers
- 470K+ Facebook Followers
Reviews
What Our Customers Say
Real Google reviews from customers whose drives stopped being detected - external drives, internal drives, and SSDs invisible to their computers - recovered in our New Jersey lab.
Undetected Drives We Recover
Drives stop being detected for many different reasons - PCB failure, firmware corruption, USB bridge board failure, head failure, and more. Below are common drives and devices we recover data from when they are no longer recognized by your computer. If your specific drive is not listed, do not worry - we recover from all brands, models, and form factors. Call 732-933-7717 or submit a free quote.
Western Digital
- WD My Passport (USB 2.0/3.0, all capacities)
- WD My Book (Desktop, Duo, Live)
- WD Elements (Portable & Desktop)
- WD Easystore (Portable & Desktop)
- WD Blue (2.5" & 3.5" SATA)
- WD Black Performance (SATA & NVMe)
- WD Red / Red Plus / Red Pro NAS
- WD Purple Surveillance
- WD Gold Enterprise
Seagate
- Seagate Barracuda (all generations)
- Seagate Expansion (Portable & Desktop)
- Seagate Backup Plus (Slim, Portable, Hub)
- Seagate IronWolf / IronWolf Pro NAS
- Seagate Exos Enterprise
- Seagate One Touch (USB-C & USB-A)
- Seagate FireCuda SSHD
Toshiba & HGST
- Toshiba Canvio (Basics, Advance, Flex)
- Toshiba MQ Series (2.5" laptop drives)
- Toshiba N300 NAS
- Toshiba X300 Performance
- Toshiba L200 Laptop
- HGST Travelstar (2.5" mobile)
- HGST Ultrastar (enterprise)
- HGST Deskstar NAS
SSD & Other
- Samsung T5 / T7 Portable SSD
- Samsung 860 / 870 EVO SATA SSD
- Samsung 970 / 980 / 990 NVMe SSD
- Crucial MX500 / BX500 SATA SSD
- Crucial P3 / P5 NVMe SSD
- Kingston A400 / NV2 SSD
- SanDisk Extreme / Extreme Pro Portable SSD
- LaCie Rugged (USB-C, Thunderbolt)
- LaCie d2 Professional
- G-Technology G-DRIVE / ArmorATD
- Maxtor M3 / D3 Station
- Sabrent Rocket NVMe SSD
- Intel 660p / 670p NVMe SSD
$100 diagnostic · No data, no charge · Free shipping
Why Your Drive Is Not Being Detected
Non-detection has a handful of root causes - and the right repair is completely different for each one. Our diagnostic identifies exactly which one you have before any work begins.
The drive drops in and out of the device list - or never appears at all. The data is still on the platters; the drive just cannot report itself.
-
PCB / Electrical Failure
The printed circuit board is the brain of your hard drive. A blown TVS diode, failed motor controller, or damaged preamplifier can prevent the drive from spinning up or communicating with your computer entirely. Power surges, cheap adapters, and plugging a 12V adapter into a 5V drive are common culprits. The drive appears completely dead - no spin, no detection, nothing. PCB repair requires matching the exact board revision and transplanting the ROM chip containing the drive's unique calibration data.
-
Head Failure Causing Non-Detection (BSY State)
When read/write heads fail, the drive cannot read its firmware modules from the platters during initialization. The drive enters a BSY (busy) state - the motor spins, the heads attempt to read, fail, retry, and the drive never becomes ready. Your computer sees the drive on the SATA or USB bus momentarily but it never mounts. Some drives click briefly before going silent. This is not a simple firmware issue - the heads are physically damaged and require a clean bench head swap before any data can be accessed.
-
Firmware Corruption
Your hard drive stores critical operating instructions in a hidden firmware zone on the platters called the service area. When these firmware modules become corrupted - due to sudden power loss, bad sectors in the service area, or manufacturing defects - the drive cannot complete its initialization sequence. The motor spins, the heads may even move, but the drive never identifies itself to the computer. The infamous Seagate BSY bug is a well-known example where a firmware pointer became corrupted, rendering millions of perfectly healthy Seagate drives completely undetectable. MDrepairs uses the PC-3000 to access and repair service area modules directly.
-
USB Bridge Board Failure
External drives use a USB-to-SATA bridge board inside the enclosure to translate between the USB interface your computer sees and the SATA interface the actual drive uses. When this bridge board fails - due to a power surge, static discharge, or component degradation - your computer either sees nothing at all or rapidly connects and disconnects. The hard drive inside is often perfectly healthy. Recovery is straightforward: we remove the drive from the enclosure, connect it directly via SATA, and image it. Some newer WD drives use encryption on the bridge board, which adds complexity but is still recoverable.
-
Drive Not Detected in BIOS
When your internal drive disappears from BIOS entirely, it means the drive is not completing its power-on initialization at all. The motherboard sends a query and gets no response. This can be caused by a dead PCB, seized motor, failed heads preventing firmware reads, a bad SATA cable, or a failed SATA port on the motherboard. The first step is isolating the cause - we test the drive on our own known-good power supplies, SATA cables, and controllers before touching the drive itself.
-
Drive Shows Wrong Capacity or 0 Bytes
Your drive appears in Device Manager or Disk Management but reports a wildly incorrect capacity - 0 bytes, 8MB, 32MB, or some other fraction of its actual size. This is almost always a firmware translation table corruption issue. The drive's internal lookup tables that map logical sectors to physical platter locations have become corrupted, so the drive reports only the size of its firmware zone instead of its full user data area. The data is still on the platters but the drive has lost its roadmap to find it.
-
Drive Spins But Is Not Detected
You can hear the drive spin up - it sounds normal, no clicking - but your computer does not see it at all. This is one of the most common symptoms we see and it almost always points to firmware corruption or a partial head failure. The motor and most mechanical components are healthy, but the drive cannot read the initialization data it needs to identify itself and become ready. These cases typically have very high recovery rates because the platters are undamaged.
-
Drive Does Not Spin At All
Complete silence when you plug the drive in. No spin, no vibration, no lights on an external enclosure. This means the drive is not receiving power or cannot use the power it is receiving. Common causes include a blown TVS diode (the drive's built-in surge protector), a failed motor controller chip on the PCB, seized spindle motor bearings, or a dead USB bridge board on external drives. While this sounds catastrophic, it is often one of the more straightforward recoveries - PCB repair or motor work gets the platters spinning again and the data is usually intact.
How We Recover Your Data
-
Free Quote & Intake
Ship your undetected drive to our Lincroft, NJ lab with free insured shipping, or drop it off in person. We log your case and begin the diagnostic process within one business day of arrival. Include details about when and how the drive stopped being detected - this helps us narrow down the failure type before we even open the case.
-
$100 Diagnostic Assessment
We test the drive's PCB for electrical integrity, check for motor response, examine the heads under controlled power-on, and analyze firmware health with the PC-3000. For external drives, we test the bridge board separately from the drive itself. You receive a detailed report explaining exactly why your drive is not being detected and a firm recovery quote.
-
Approve or Decline - No Obligation
After the diagnostic, you decide whether to proceed. If you approve, the $100 diagnostic fee is applied toward your total recovery cost. If you decline, you pay only the diagnostic fee and we return your drive. No pressure, no hidden charges.
-
Professional Recovery
Depending on the diagnosis, recovery may involve PCB repair, firmware module restoration using the PC-3000, USB bridge bypass, clean bench head swap, or motor work. We image the drive sector by sector to a healthy target drive, working around any damaged areas to maximize data yield.
-
Data Verification & Return
Once imaging is complete, we verify your recovered files for integrity and provide a file listing for your review. Your data is transferred to a new external drive or cloud storage of your choice and shipped back with free insured shipping. No data, no charge.
Undetected Drive Recovery Pricing
The cost of recovering data from an undetected drive depends entirely on why it is not being detected. A simple USB bridge board failure or blown TVS diode is a fraction of the cost of a head swap or firmware rebuild. The $100 diagnostic fee is always applied toward your recovery cost, and our no data, no charge policy means you never pay for a failed recovery. Call 732-933-7717 for a free consultation before shipping your drive.
-
Logical / Firmware Recovery
$650 - $1,200Data recovery from drives with firmware corruption, translation table errors, service area damage, BSY state, or drives showing wrong capacity. Includes PC-3000 firmware module repair and sector-level imaging.
- Firmware module restoration
- Translation table rebuild
- Service area repair
- BSY state resolution
- Wrong capacity / 0 bytes fix
- $100 diagnostic applied to cost
-
Head Swap / Mechanical Recovery
$1,000 - $2,000Recovery from drives not detected due to head failure, seized motor, stiction, or other mechanical issues requiring clean bench work. Includes donor head transplant and PC-3000 imaging.
- Failed read/write head replacement
- Motor failure repair
- Stiction recovery (heads stuck to platter)
- Clean bench head transplant with donor
- PC-3000 selective head imaging
- $100 diagnostic applied to cost
-
Platter / Severe Damage Recovery
$999 - $2,500+Recovery from drives with platter surface damage, contamination, scoring from head crashes, or drives that failed at other labs. Includes helium drive recovery ($2,000 - $3,500+).
- Scratched platter recovery
- Contamination and debris removal
- Head crash damage recovery
- Multi-platter transplant
- Conservative imaging around damaged zones
- $100 diagnostic applied to cost
All pricing includes the $100 diagnostic fee. No data, no charge. If we can't recover your target files, you only pay the diagnostic fee.
Turnaround Times
Every data recovery case at MDrepairs begins with a $100 diagnostic evaluation - PCB testing, motor current analysis, controlled spin-up with head monitoring, and PC-3000 firmware analysis. You receive a detailed report within 48 hours explaining exactly why your drive is not being detected, along with recovery likelihood and a firm quote. The $100 is applied toward your final recovery cost. If we cannot recover your target files, you pay only the $100 diagnostic fee - no data, no charge.
- 4 - 5 Weeks Standard No surcharge
Full assessment with recovery options and pricing.
- 5 - 7 Days Priority Rush +$250
Jumps to the front of the queue.
- 1 - 2 Days Urgent Rush +$500
Dedicated technician for time-sensitive cases.
- Same Day Emergency +$1,000
Immediate start. Highest priority, mission-critical.
Drive invisible to your computer? $100 diagnostic credited, free insured shipping, no data, no charge.
Secure Mail-In Hard Drive Recovery from Anywhere
Free 2nd-Day-Air prepaid labels to all 50 states - the same in-house cleanroom expertise as our in-person service, with real-time status updates. Your drive is typically in our Lincroft, New Jersey lab within 2 - 3 business days, and return shipping is free too.
- Free prepaid label, both ways
- Fully insured, 2nd-Day-Air UPS
- Real-time status updates
Free 2nd-Day-Air UPS shipping covers the USA, excluding islands.
How Mail-In Works
- 1
Contact Us
Request a free quote and we’ll send you a prepaid, insured shipping label - printed right on the mail-in form.
- 2
Ship Your Drive
Pack your drive securely and drop it at any UPS location. Shipping is free both ways - free 2nd-Day-Air UPS, fully insured.
- 3
We Recover Your Data
Your drive is diagnosed and recovered by our lead technician Joseph Montanti using PC-3000 and DeepSpar tools in our professional clean-bench environment.
- 4
Data Returned
Your recovered data ships back on a new drive - free 2nd-Day-Air UPS, insured, and verified before it leaves our lab.
Hard Drive Not Detected Data Recovery - Recovery Cases
See how our lab handles real data recovery cases - from initial diagnosis through final data delivery.
-
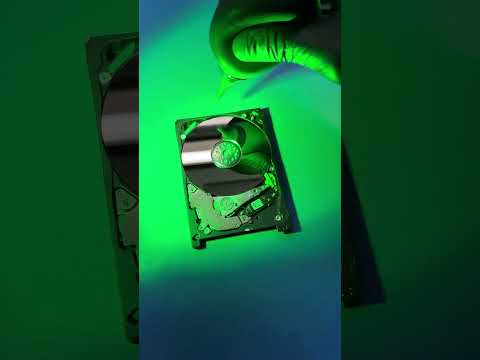
External Drive Not Detected - USB Bridge Board Bypass
-

Bent Chassis Recovery - Internal Structural Damage
-

Stiction Recovery - Head Bonded to Platter Surface
-

Clicking Drive - Preventing Platter Damage from Failed Heads
Data Privacy & Chain of Custody
Your data is handled under strict chain-of-custody procedures from intake to secure destruction.
-
Intake Logging
Every drive is photographed and logged with a unique case number, serial, model, and condition on arrival.
-
Restricted Access
Only your assigned technician handles your drive. No shared workstations, no exceptions.
-
No Browsing Data
We never open or view your files. Integrity is verified through checksums and file structure only.
-
Secure Delivery
Data is transferred to a new drive and shipped back to you. All copies are purged after confirmation.
-
Drive Return
Your new drive is returned with your recovered data.
What You Receive After Recovery
-
Your Recovered Data
Your files are delivered on a new external hard drive shipped directly to you, or we send you a password-protected download link for secure retrieval. We include a file listing so you can verify everything before we purge our copies.
-
Your Original Drive
After recovery is complete, you choose what happens to your original drive - we can return it to you, hold it for a specified period, or securely destroy it. All copies of your data on our systems are purged after you confirm receipt.
-
Ongoing Support
Need help accessing your recovered files, transferring data to a new device, or setting up backups to prevent future data loss? Our team is available after delivery to help you get back on track.
Talk to the engineer who runs the PC-3000 - not a call center.
Understanding Why Drives Stop Being Detected
A complete, plain-English breakdown of every cause of non-detection - from BIOS and USB bridge failures to firmware corruption, head failure, and "0 bytes" issues - plus what is safe to try and when software cannot help.
01 How It Works
Why Hard Drives Stop Being Detected
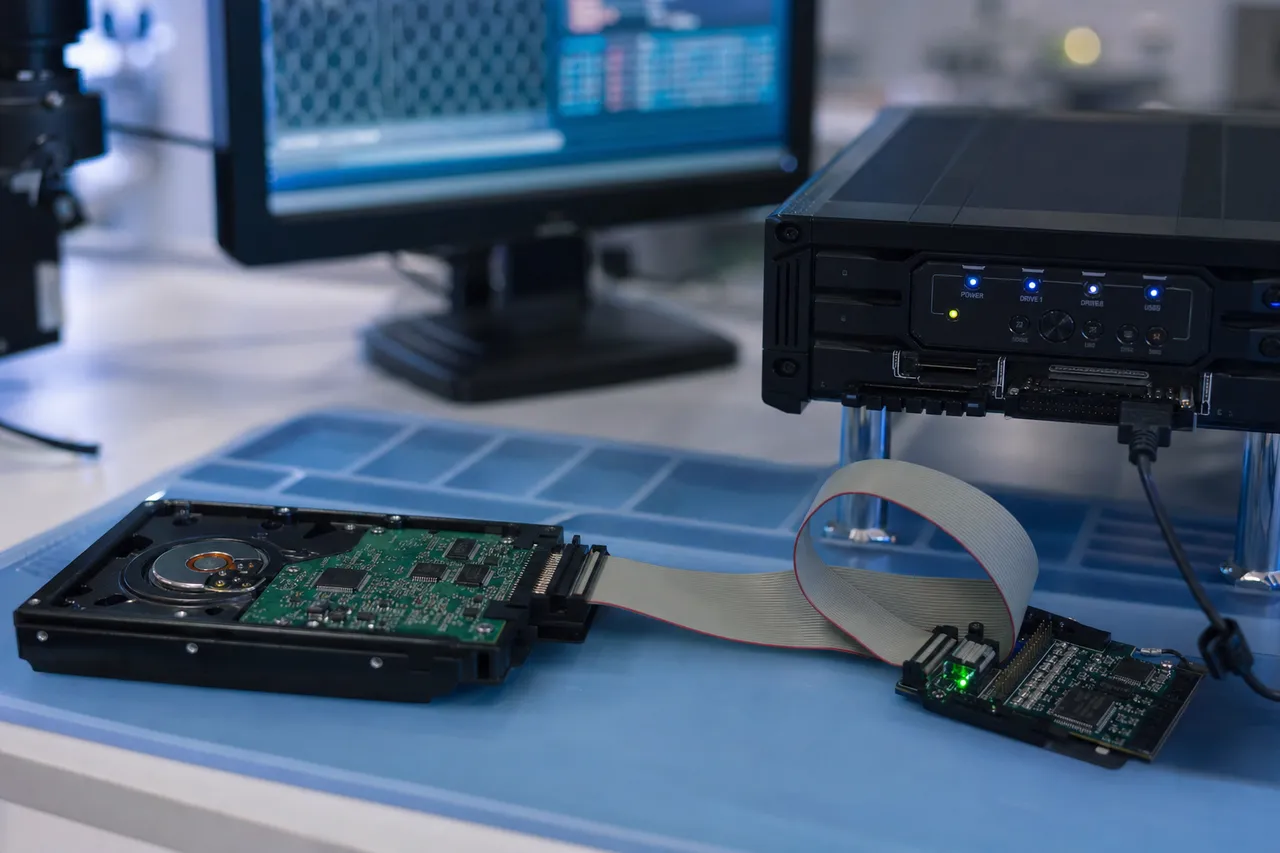
A hard drive that suddenly stops being detected is not necessarily dead. In fact, in our experience at MDrepairs, the majority of undetected drives contain perfectly intact data sitting on undamaged platters - the drive simply cannot communicate with your computer due to a failure in the electronics, firmware, or mechanical components needed for initialization.
To understand why drives stop being detected, you need to understand what happens when you plug a drive in or power on your computer. A modern hard drive goes through a complex boot sequence before it ever shows up in your operating system:
The Hard Drive Initialization Sequence
Step 1 - Power-On and Motor Spin-Up: The PCB (printed circuit board) receives power and activates the spindle motor controller. The motor begins spinning the platters, accelerating from zero to 5,400 or 7,200 RPM within a few seconds. If the PCB is damaged, the motor controller has failed, or the motor bearings are seized, the process stops here. The drive never spins, never generates a signal, and your computer sees nothing.
Step 2 - Head Unpark and Firmware Read: Once the platters reach operating speed, the read/write heads move from their parking position (usually on a ramp at the edge of the platters) to the innermost tracks where the firmware service area is located. The heads must successfully read several critical firmware modules - the drive's identity information, defect tables, adaptive parameters, and translator maps. If even one head has failed, or if the firmware zone has bad sectors or corrupted modules, the drive gets stuck in a loop - attempting to read, failing, retrying, and eventually timing out.
Step 3 - Drive Identification: After successfully reading its firmware, the drive sends its identity string to the host controller - the model number, serial number, capacity, and supported features. This is the ATA IDENTIFY command response. If the drive never reaches this stage, it simply does not exist as far as your computer is concerned. BIOS will not list it, Device Manager will not show it, and Disk Management will not display it.
Step 4 - Ready State: The drive enters the READY state and begins accepting read/write commands from the operating system. The file system is mounted, the drive letter appears, and you can access your data. A drive that completes Steps 1 - 3 but fails at Step 4 may appear in BIOS or Device Manager but show as "Unknown," "Not Initialized," or with an incorrect capacity.
When a customer tells us their drive is "not detected," the failure could be at any of these four stages. Our diagnostic process identifies exactly where the initialization sequence breaks down, which tells us exactly what needs to be repaired to get the data back.
02 On The Bus
Internal Drive Not Detected in BIOS
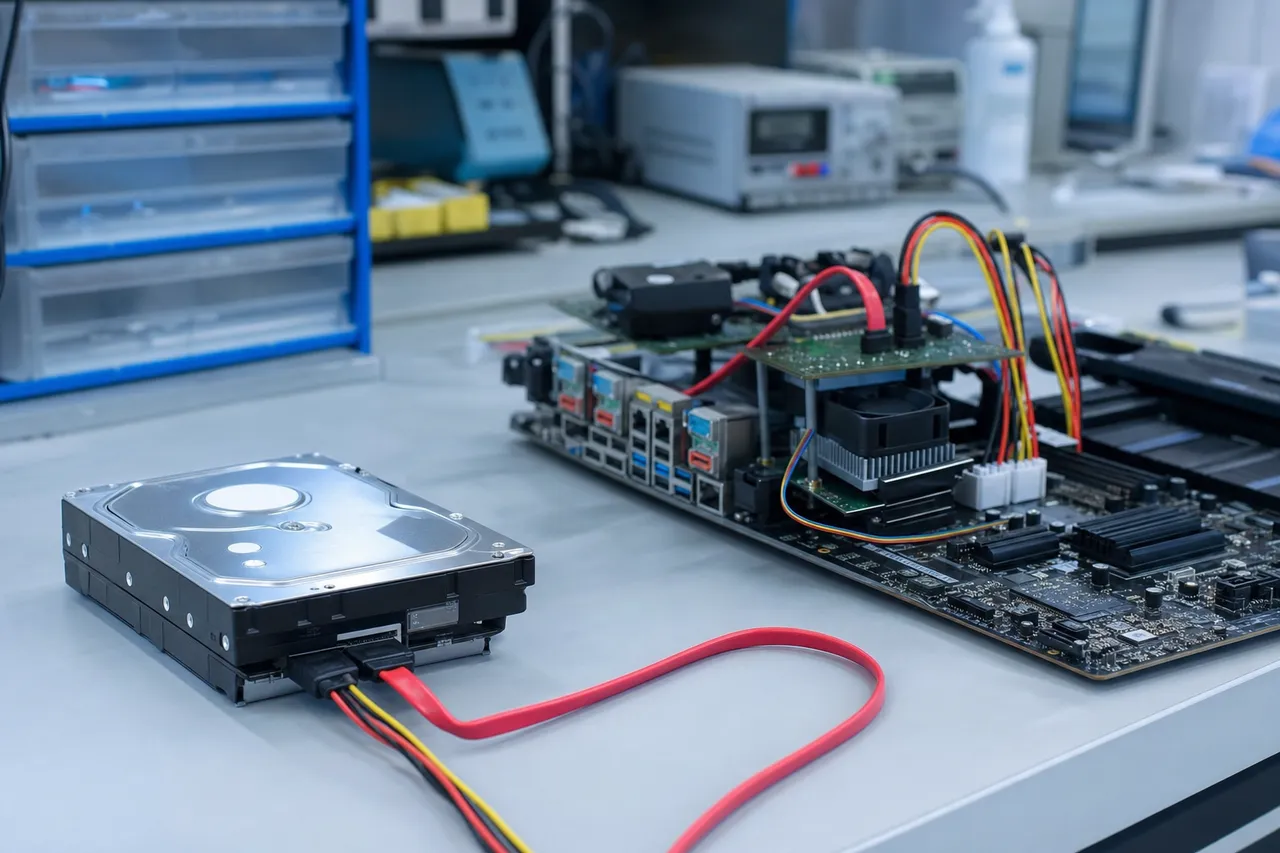
When your internal hard drive disappears from your computer's BIOS (or UEFI firmware), it means the drive is not completing its initialization sequence at the hardware level. The motherboard sends a query on the SATA bus and receives no response. This is the most fundamental level of non-detection - if BIOS cannot see the drive, nothing above it (Windows, macOS, Linux, Disk Management) can see it either.
Common Causes of BIOS Non-Detection
Dead or Damaged PCB: The most common cause we see at MDrepairs. A power surge, a failing power supply, or even normal component degradation can kill the PCB. The TVS diode (a tiny component that acts as a built-in surge protector) is often the first thing to blow. When the TVS diode short-circuits, it prevents any power from reaching the rest of the board. The drive appears completely dead. In many cases, removing or replacing the blown TVS diode is enough to get the drive spinning again. More severe PCB damage may require transplanting the entire board from a matching donor drive, which also requires moving the ROM chip that contains the drive's unique adaptive calibration data.
Firmware Corruption in the Service Area: The drive spins up and the heads move, but the drive never sends its identity to the SATA controller because it cannot read its own firmware. You might hear the drive spin, hear a brief head movement, then silence - or you might hear the drive repeatedly spin up and spin down in a loop. The Seagate BSY bug is the most famous example of this failure type, but it affects all brands. Firmware corruption can be caused by sudden power loss during a write operation to the service area, natural degradation of the magnetic media in the firmware zone, or a firmware update that went wrong.
Head Failure Preventing Firmware Read: The motor spins, the PCB is fine, but the heads cannot read the firmware tracks on the platter. Without firmware, the drive cannot identify itself. This is functionally identical to firmware corruption from your computer's perspective - the drive just sits there - but the repair is completely different. Firmware corruption requires software-level repair with the PC-3000. Head failure requires a clean bench head swap. Misdiagnosing one as the other wastes time and can cause additional damage, which is why proper diagnostics matter.
Seized Spindle Motor: The motor bearings have failed or the spindle has become physically locked. The PCB tries to spin the motor, the motor draws excessive current but does not rotate, and the drive times out without ever becoming ready. You may hear a faint buzzing or humming sound as the motor strains against the seized bearing. Seized motors are relatively uncommon in modern drives but we see them in older drives and drives that have been in storage for years.
What You Should Not Do
When your internal drive disappears from BIOS, resist the urge to repeatedly power cycle the computer, swap SATA cables and ports, or install the drive in another computer over and over. If the drive has a head failure, each power-on attempt causes the failing heads to sweep across the platter surface, potentially causing irreversible scratching. If the drive has a firmware issue, each failed boot cycle can corrupt additional firmware modules. The safest course of action is to disconnect the drive, leave it powered off, and contact MDrepairs for a professional diagnostic.
03 External Drives
External Drive Not Recognized via USB
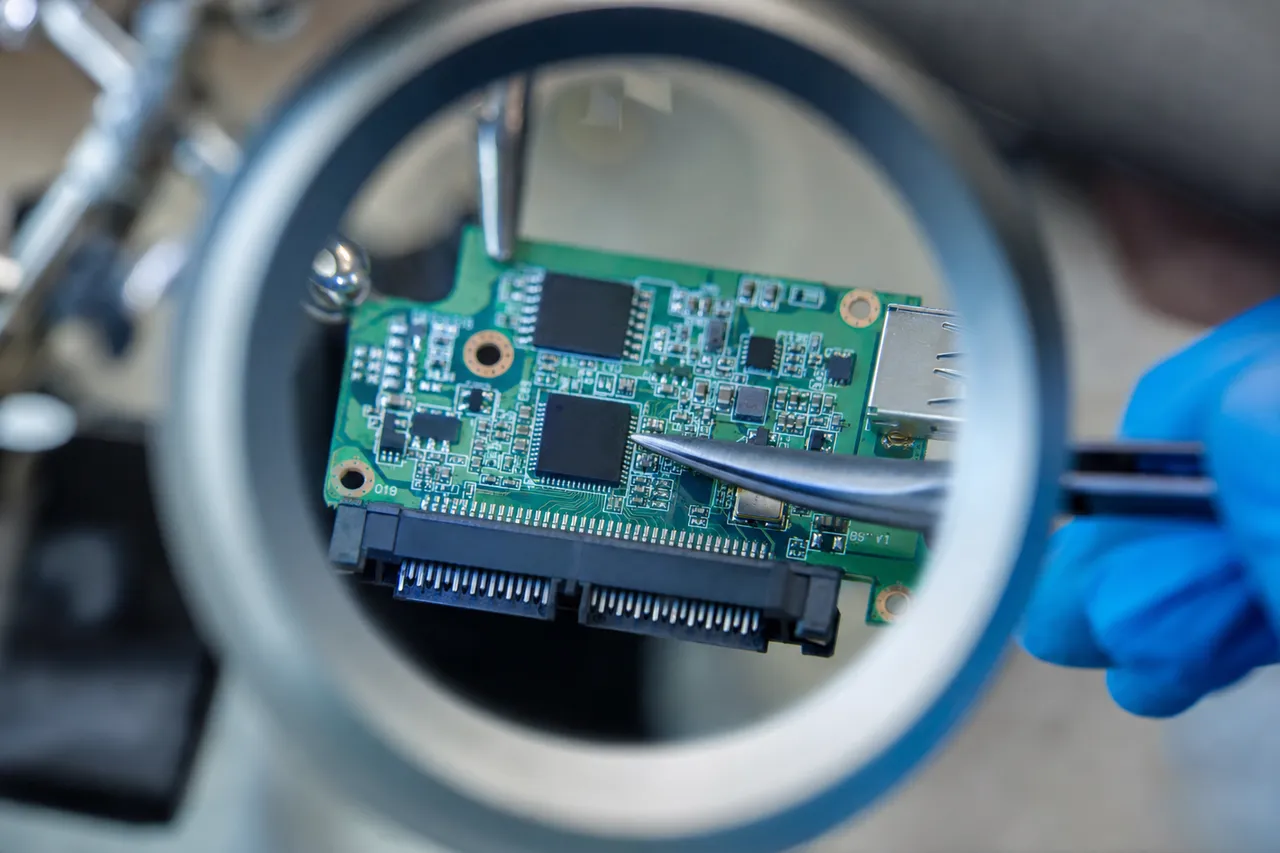
External hard drives add an extra layer of complexity to the non-detection problem: the USB bridge board. Every external drive is just a regular internal hard drive inside an enclosure, connected to a small circuit board that translates between the SATA interface the drive uses internally and the USB interface your computer uses externally. This bridge board is a common single point of failure that makes the entire drive invisible to your computer even when the drive itself is perfectly healthy.
USB Bridge Board Failure
The USB-to-SATA bridge board is often the weakest link in an external drive. It is a small, inexpensive circuit board that is not built to the same standards as the drive itself. Power surges, static discharge, faulty USB hubs, and hot-swapping the drive while it is being written to can all damage the bridge board. When the bridge fails, the drive appears dead to your computer - no drive letter, no Disk Management entry, no Device Manager listing, or sometimes the drive rapidly connects and disconnects (you hear the USB connection sound repeatedly).
The good news is that bridge board failure is often the easiest and least expensive recovery we perform. We remove the drive from its enclosure, connect it directly to a SATA port on our workstation or the PC-3000, and if the drive itself is healthy, we can image it immediately without any further repair work. The data was never in danger - it was just trapped behind a dead translator.
The WD Encryption Complication
Western Digital introduced hardware-level encryption on many of their external drive enclosures starting around 2013. The USB bridge board encrypts every block of data as it is written to the drive and decrypts it as it is read back. The encryption key is stored on a chip on the bridge board itself. This means that even though the data on the platters is technically intact, it is encrypted - and simply connecting the drive to a standard SATA port will produce gibberish instead of your files.
When the bridge board on an encrypted WD external drive fails, we cannot just bypass it. We need to either repair the original bridge board, transplant the encryption chip to an identical working board, or use specialized tools to extract the encryption key and decrypt the data after imaging. MDrepairs has extensive experience with WD encrypted external drives - including My Passport, My Book, Elements, and Easystore models. We maintain an inventory of bridge boards across multiple hardware revisions for exactly these situations.
Seagate External Drive Behavior
Seagate external drives handle the USB bridge differently than WD. Most Seagate external drives do not use hardware encryption, so the drive inside is a standard SATA drive that can be removed and connected directly. However, some newer Seagate portable drives (particularly the Expansion and One Touch USB-C models) use a direct USB interface without a standard SATA connector on the drive itself. These drives have the USB controller integrated into the drive's main PCB, which means a bridge board failure is actually a PCB failure, and the repair approach is different.
Signs Your USB Bridge Board Has Failed
There are several telltale signs that distinguish a bridge board failure from a drive failure:
The drive still spins when plugged in - you can feel vibration and hear the platters spinning normally. If the bridge board is dead but the drive receives power through a separate power connection (common in desktop external drives), the drive will spin up fine. The bridge board failure only prevents communication, not power delivery in these cases.
Rapid connect/disconnect cycling - Windows plays the USB connect sound, then immediately plays the disconnect sound, over and over. The bridge board is partially functional but cannot maintain a stable connection.
Drive appears in Device Manager with an error - the USB controller is detected but the drive behind it is not accessible. You may see "Unknown USB Device (Device Descriptor Request Failed)" or a yellow exclamation mark.
The enclosure light blinks but the drive does not mount - power indicator LED works but no drive letter appears.
If you observe any of these symptoms, the drive inside your enclosure is likely healthy. Do not throw the drive away assuming the data is gone - contact MDrepairs for a diagnostic.
04 Solid State
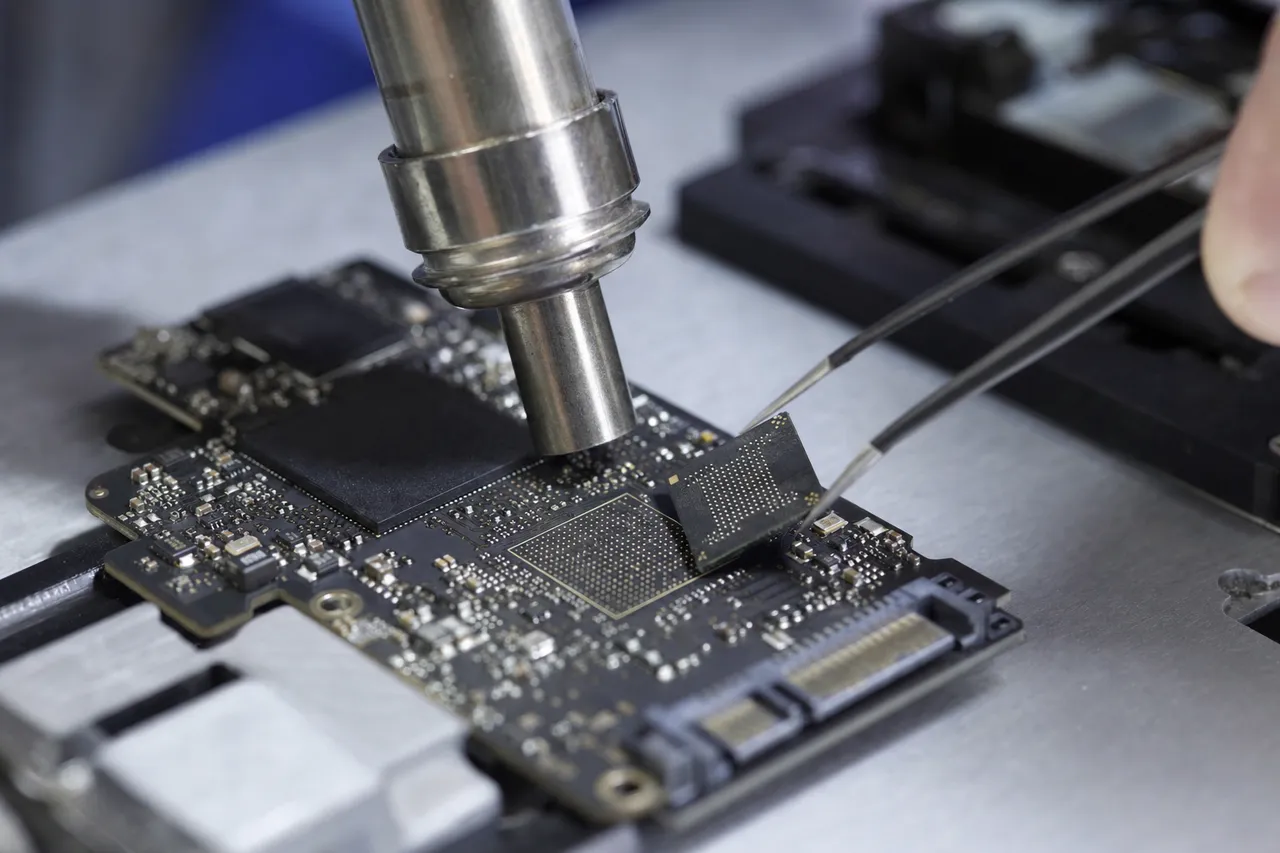
SSD Not Detected - Different Causes, Different Solutions
Solid-state drives fail differently than traditional hard drives because they have no moving parts. When an SSD stops being detected, the failure is always electronic or at the firmware/controller level - there are no heads to swap, no motors to repair, and no platters to transplant. This makes SSD non-detection both simpler in some ways and far more complex in others.
Controller Chip Failure
The controller is the SSD equivalent of a CPU. It manages all read/write operations, wear leveling, garbage collection, error correction, and communication with your computer. When the controller fails, the SSD becomes completely invisible to your system - BIOS will not detect it, the operating system will not see it, and no amount of cable swapping or driver reinstallation will help. Controller failure can be caused by power surges, overheating, manufacturing defects, or simple component degradation over time.
Recovering data from an SSD with a failed controller is fundamentally different from recovering data from a hard drive. On a hard drive, the data is stored on magnetic platters in a relatively straightforward format that can be read by any compatible head assembly. On an SSD, the data is spread across dozens or hundreds of NAND flash memory chips, fragmented by the controller's wear leveling algorithms, and potentially encrypted by the controller's built-in encryption. Without a functioning controller to reassemble the fragments, the raw NAND data is a jigsaw puzzle with no picture on the box. MDrepairs uses specialized SSD recovery tools that can read the raw NAND flash chips directly, analyze the controller's wear leveling algorithms, and reconstruct the data in the correct order. Success rates for SSD controller failure recovery depend heavily on the specific controller chip and whether the data was encrypted.
Firmware Corruption on SSDs
SSDs have firmware just like hard drives, and that firmware can become corrupted. Sudden power loss is the most common cause - if the SSD was in the middle of a write operation or garbage collection cycle when power was cut, the firmware tables that map logical sectors to physical NAND locations can become corrupted. The SSD may appear in BIOS with the wrong model name, show as 0 bytes, or not appear at all. Some SSD firmware corruption can be repaired using the PC-3000 SSD module, which supports a wide range of controller types including Phison, Silicon Motion, Marvell, Samsung, and SanDisk/WD controllers. When firmware repair is possible, it is the fastest and most cost-effective recovery path - the NAND chips do not need to be removed or read individually.
NAND Flash Degradation
Every NAND flash cell has a limited number of write cycles before it becomes unreliable. Consumer SSDs typically use TLC (triple-level cell) or QLC (quad-level cell) NAND, which has lower endurance than the MLC or SLC NAND used in enterprise drives. When enough NAND cells degrade, the SSD's error correction can no longer compensate, and the drive fails. This can manifest as sudden non-detection if the failed cells are in the firmware or mapping table area of the drive.
NVMe vs. SATA SSD Non-Detection
NVMe SSDs connect via the M.2 slot or PCIe bus, while SATA SSDs use the traditional SATA interface. NVMe non-detection can sometimes be caused by M.2 slot compatibility issues (some M.2 slots only support SATA, not NVMe, and vice versa), but true non-detection due to drive failure follows the same patterns - controller failure, firmware corruption, or NAND degradation. The recovery approach is the same regardless of interface, though the specific tools and techniques vary by controller type.
05 Electronics
PCB Failure and Power Issues
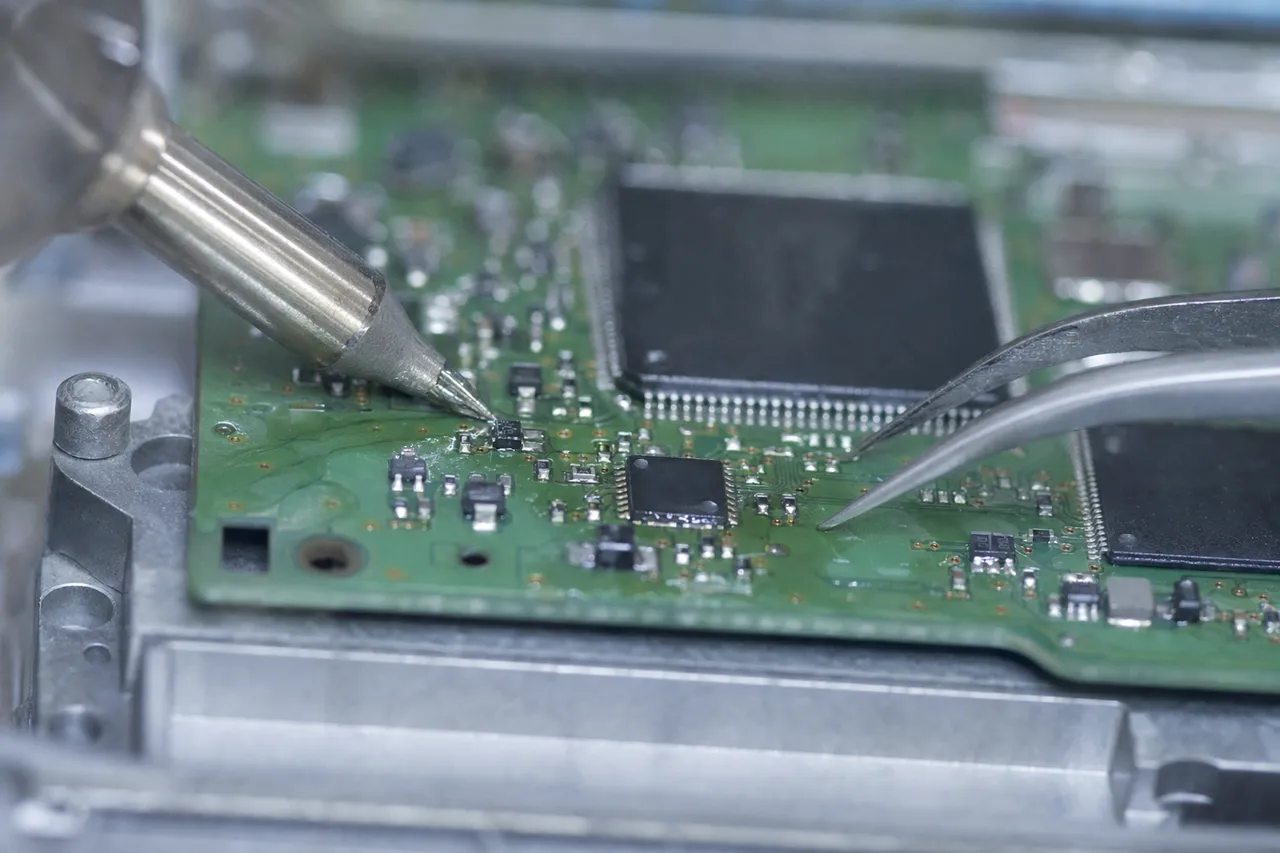
The printed circuit board (PCB) is the first component in the chain between your power source and your data. Every electrical signal passes through the PCB - power regulation, motor control, head positioning, data reading, and SATA/USB communication all depend on the PCB functioning correctly. When the PCB fails, nothing else works.
TVS Diode Failure - The Most Common PCB Issue
TVS (Transient Voltage Suppressor) diodes are small surface-mount components on the PCB that act as built-in surge protectors. When a voltage spike hits the drive - from a power surge, a failing power supply, or even a cheap USB hub - the TVS diode is designed to short-circuit and sacrifice itself to protect the rest of the board. This is intentional. The diode saves the drive, but the short circuit prevents any power from reaching the rest of the PCB.
Diagnosing a blown TVS diode is relatively straightforward for a trained technician. The diode measures as a short circuit rather than its normal resistance value. In many cases, simply removing the shorted TVS diode restores power to the board and the drive spins up and becomes detectable immediately. The drive will operate without the TVS diode - it just loses its surge protection, so the recovered data should be moved to a new drive. However, if the voltage surge was severe enough, it may have damaged components beyond the TVS diode - the motor controller IC, the preamplifier chip, the ROM chip, or traces on the board itself. In these cases, a full PCB transplant from a matching donor board is required.
PCB Transplant - Not as Simple as Swapping Boards
Online forums are full of advice telling people to find an identical hard drive and swap the PCB. This advice is dangerously incomplete. Every hard drive PCB contains a ROM chip (sometimes called a BIOS chip or NVRAM) that stores the drive's unique adaptive calibration data - information about the specific physical characteristics of that individual drive's heads, platters, and motor. This data is unique to each individual drive, even within the same model and firmware revision.
If you simply swap the PCB without transferring the ROM chip, the drive will spin up with the wrong calibration data. The heads will be positioned incorrectly, the read channels will be tuned for different head characteristics, and the drive will either fail to read its firmware, corrupt its service area, or in worst cases, cause the misaligned heads to crash into the platter surface. We see drives arrive at MDrepairs with additional damage caused by well-intentioned PCB swaps done without ROM transplants.
The correct procedure is to desolder the ROM chip from the original damaged PCB, solder it onto the donor PCB, and then install the donor PCB on the patient drive. This requires micro-soldering equipment and experience - the ROM chips are tiny surface-mount components with tight pin spacing. At MDrepairs, PCB repair and ROM transplant is a routine procedure we perform multiple times per week.
Power Supply and Adapter Issues
Before assuming the worst, it is worth noting that some drives stop being detected simply because they are not receiving adequate power. Desktop external drives require a 12V/5V power adapter, and these adapters do fail. A drive that gets 5V but not 12V will have a functioning PCB but a motor that cannot spin. Some USB 3.0 drives require more power than certain USB ports can deliver - particularly USB ports on keyboards, monitors, or unpowered hubs. If your drive clicks once and disappears, try connecting it to a USB port directly on the back of the computer before assuming the drive itself has failed.
06 The Invisible Killer
Firmware Corruption - The Invisible Killer
Firmware corruption is one of the most common reasons drives stop being detected, and it is also one of the most misunderstood. When most people think of a "dead" hard drive, they imagine mechanical destruction - broken heads, scratched platters, seized motors. But firmware corruption can make a perfectly healthy drive completely invisible to your computer without any physical damage whatsoever.
What is Hard Drive Firmware?
Hard drive firmware is the low-level software that controls every aspect of the drive's operation. It is stored in two locations: a small portion is stored on the PCB's ROM chip (the initial boot code), and the bulk of it is stored on the platters themselves in a hidden area called the service area (also called the system area, maintenance area, or negative cylinders depending on the manufacturer). The service area typically occupies the innermost cylinders of the platters and contains dozens of firmware modules, including:
Drive identity module: The drive's model number, serial number, capacity, and feature set. If this module is corrupted, the drive may report the wrong model name, wrong capacity, or fail to identify itself at all.
Defect tables (P-List and G-List): Maps of known bad sectors on the platters. The P-List (Primary defect list) is written during manufacturing. The G-List (Grown defect list) is updated during the drive's lifetime as new bad sectors are detected. If the defect tables are corrupted, the drive may try to read data from defective areas and get stuck in retry loops.
Translator tables: The mapping between logical block addresses (what your operating system uses) and physical cylinder/head/sector locations (where the data actually lives on the platters). Corrupted translator tables are why drives show 0 bytes or an incorrect capacity - the drive has lost its roadmap for locating your data.
Adaptive parameters: Calibration data specific to the individual drive's head and platter characteristics. This includes head fly height settings, read channel tuning parameters, and zone boundary definitions. These are partially duplicated on the ROM chip, but the platter-based copy is the authoritative version.
SMART data modules: Self-Monitoring, Analysis, and Reporting Technology data - the drive's health history. While SMART module corruption rarely prevents detection on its own, it can trigger error states that complicate other firmware issues.
The Seagate BSY Bug - A Case Study in Firmware Failure
The most infamous firmware corruption issue in hard drive history is the Seagate BSY bug, which affected multiple Seagate Barracuda 7200.11 and DiamondMax 22 models manufactured between 2008 and 2009. A flaw in the firmware caused a specific module (the CERT or SMART data log) to grow until it exceeded its allocated space, corrupting adjacent firmware modules. Affected drives would fail during their initialization sequence and enter a BSY (busy) state - the motor would spin, the heads would move, but the drive would never become ready. Millions of perfectly healthy drives were rendered completely undetectable by this firmware bug.
The fix involved accessing the drive's diagnostic terminal interface (a serial port on the PCB), issuing specific vendor commands to clear the BSY state, and then updating the firmware to prevent recurrence. MDrepairs resolved hundreds of BSY bug cases using this exact procedure, recovering data from drives that other shops declared physically dead. While the original BSY bug was specific to certain Seagate models, similar firmware failures occur across all hard drive brands. Western Digital, Toshiba, HGST, Samsung, and Maxtor drives all have their own firmware architectures and their own failure modes. The PC-3000 supports direct service area access for all major manufacturers, allowing us to diagnose and repair firmware issues regardless of brand.
What Causes Firmware Corruption?
Sudden power loss: If the drive loses power while writing to the service area - during a firmware update, SMART log write, or defect table update - the interrupted write can leave a module in a corrupted state. This is the single most common cause of firmware corruption we see at MDrepairs.
Bad sectors in the service area: The firmware zone uses the same magnetic media as the data area. Over time, sectors in the service area can develop read errors just like data sectors. When a critical firmware module falls on a bad sector, the drive cannot read it during initialization and fails to become ready.
Failed firmware update: Firmware updates from the manufacturer are relatively rare for consumer drives, but they do happen. A firmware update that is interrupted by power loss, or one that contains a bug (like the Seagate BSY bug), can brick the drive.
Encryption key corruption: Some drives use self-encrypting drive (SED) technology where the firmware manages encryption keys. If the encryption key module becomes corrupted, the drive may refuse to initialize even though the platters and heads are healthy.
07 Mechanical
Head Failure Causing Non-Detection
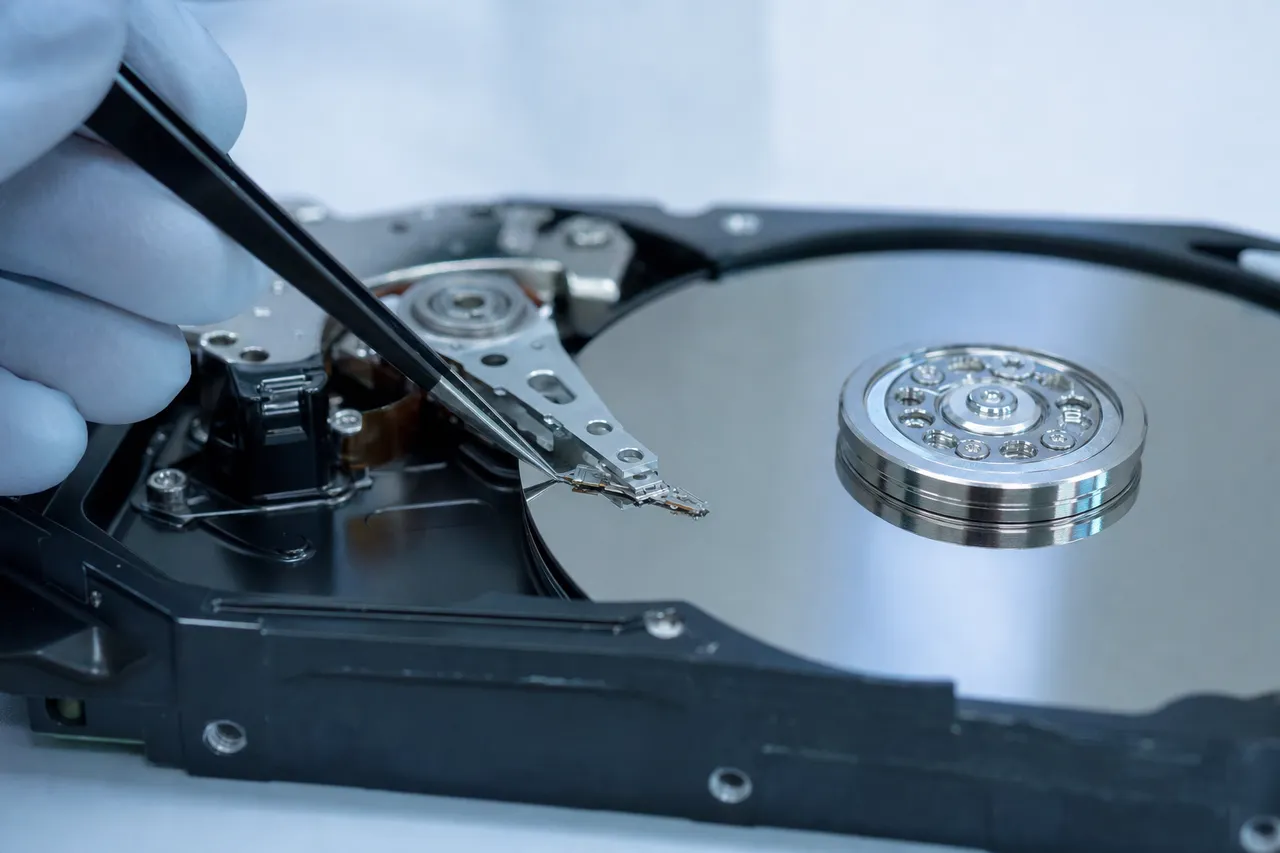
Head failure is commonly associated with clicking sounds, but not all head failures produce clicking. In many cases, a failed head causes the drive to simply not be detected - no clicking, no beeping, just silence from your operating system. Understanding why head failure causes non-detection requires understanding how the drive uses its heads during initialization.
How Head Failure Prevents Detection
A modern hard drive typically has multiple platters and multiple read/write heads - one head per platter surface. During initialization, the drive must read its firmware modules from the service area, which is typically stored on the first platter surface (head 0). If head 0 fails, the drive cannot read its firmware, and it never becomes ready - regardless of whether the other heads are healthy.
This is a critical distinction: your data may be spread across all platter surfaces using all heads, but the drive needs at least one specific head (usually head 0) to read the firmware and become operational. A single-head failure on the firmware surface can make a multi-head, multi-platter drive completely undetectable even though the vast majority of the data is stored on healthy platter surfaces accessible by healthy heads.
Partial Head Failure vs. Complete Head Failure
Complete head failure: The head is physically damaged - the slider is cracked, the read element is burned out, or the suspension arm is bent. The head cannot read any data at all. The drive enters a BSY state during firmware initialization because it cannot read the required modules. This requires a full head stack assembly swap from a matched donor drive.
Partial (degraded) head failure: The head still works intermittently or can read some tracks but not others. The drive may occasionally spin up and become briefly detectable before failing again. It may appear in BIOS for a few seconds and then disappear. The heads are degraded enough that they cannot reliably read the firmware zone tracks needed for initialization, but they might succeed on occasional retries. These cases are deceptive because the intermittent detection suggests a firmware or connection issue rather than a hardware failure.
The Danger of Repeated Power Cycling
When your drive is not detected, the natural instinct is to try again - unplug it, plug it back in, restart the computer, try a different cable, try a different port, try a different computer. Each attempt powers the drive on, causes the failing heads to sweep across the platter surface, and powers it off again. This is exactly the wrong thing to do when head failure is the cause of non-detection.
A degraded head that might still be usable in a controlled recovery environment can be destroyed by a few power cycles. The failing head element can break apart and generate debris particles inside the sealed drive enclosure. These particles contaminate the remaining healthy heads and cause cascading failures. What started as a single-head failure becomes a multi-head failure, what was a clean platter surface develops scratches, and what would have been a routine $1,200 head swap becomes a $2,500+ platter-level recovery - or worse, becomes unrecoverable.
MDrepairs uses the PC-3000 to control exactly how the drive is powered on and initialized. We can disable specific heads, modify the initialization sequence, limit current to the motor, and monitor head behavior in real time. This level of control minimizes the risk of additional damage during the diagnostic process - something that is impossible to do by simply plugging the drive into a computer.
Silent Head Failure vs. Clicking Head Failure
Many customers are confused when we diagnose head failure on a drive that never clicked. They expect clicking because that is what they have read about online. But clicking is only one possible symptom of head failure. The clicking sound occurs when the heads repeatedly try to read, fail, and retract to the parking ramp - this is the retry cycle that produces the click-click-click pattern. But if the heads fail in a way that prevents them from even attempting to read - if they are stuck, if the preamplifier chip that powers them has failed, if the head is physically broken - the drive will simply not spin up at all or spin up briefly and then go silent. No clicking, no beeping - just non-detection.
08 Good News
USB Bridge Board Failure in External Drives
USB bridge board failure is the single most common reason external drives stop being detected, and it is also the most recoverable failure type we see at MDrepairs. Understanding what the bridge board does and how it fails can save you significant time and anxiety when your external drive suddenly disappears.
What the USB Bridge Board Does
The USB bridge board is a small circuit board inside every external hard drive enclosure. Its job is simple but critical: translate between the SATA protocol that hard drives use and the USB protocol that your computer uses. The bridge board contains a controller chip (common manufacturers include ASMedia, JMicron, Initio, and Norelsys), a small amount of firmware memory, voltage regulators, and the physical USB connector. When you plug your external drive in, the bridge board powers up, initializes the SATA connection to the internal drive, waits for the drive to become ready, and then presents itself to your computer as a USB mass storage device. If the bridge board fails at any point in this sequence, your computer cannot communicate with the drive - even if the drive itself is functioning perfectly.
Common Bridge Board Failure Modes
Complete failure - no power, no detection: The bridge board is electrically dead. The drive receives no power through the USB cable (for bus-powered portable drives) or the drive receives power from its external adapter but the bridge board does not function (for desktop external drives). Your computer shows nothing - no USB device detected, no sounds, no notifications.
Partial failure - connect/disconnect cycling: The bridge board powers up but cannot maintain a stable connection. Windows repeatedly plays the USB connect and disconnect sounds. The drive may briefly appear in Device Manager before disappearing again. This is often caused by a failing voltage regulator or a cracked solder joint on the bridge board.
Controller chip failure - device descriptor error: The USB controller chip on the bridge board partially functions - enough to be detected as a USB device - but it cannot communicate with the drive behind it. Windows may show "Unknown USB Device (Device Descriptor Request Failed)" in Device Manager. The drive may appear in Disk Management as "No Media" or with a capacity of 0 bytes.
Why Bridge Board Failure Is Good News
If your external drive stopped being detected and the cause is a bridge board failure, your data is almost certainly intact. The bridge board is just a translator sitting between your computer and the drive - it does not store any of your data and its failure does not damage the drive or its contents. This is fundamentally different from head failure, firmware corruption, or platter damage, where the drive itself has a problem that affects the data.
Recovery from bridge board failure is straightforward: we open the enclosure, remove the internal drive, and connect it directly to a SATA port on our workstation or the PC-3000. If the drive is healthy (which it usually is in bridge board failure cases), we can begin imaging immediately. In many cases, we can copy the data within a few hours and the customer has their files back the same day.
The Exception: Encrypted Bridge Boards
Western Digital uses hardware encryption on many of their external drive bridge boards, as discussed in the external drive section above. Seagate generally does not encrypt on the bridge level for most consumer models, but some enterprise external products do. Toshiba Canvio drives are typically unencrypted. LaCie drives vary by model - some use encryption, some do not. When encryption is present, the bridge board failure becomes more complex because the encryption key must be preserved or extracted. This is why we always recommend against throwing away a failed bridge board or enclosure - even if the board is dead, the encryption key chip on it may still be readable and is essential for recovering your data.
DIY Enclosure Removal - Should You Do It?
For non-encrypted drives, you might be tempted to open the enclosure yourself and connect the drive to a SATA dock or cable. For simple enclosures that use screws, this is relatively low-risk. But many modern external drives use snap-fit enclosures with no visible screws - opening them requires carefully prying the case apart, which risks slipping and damaging the PCB or drive. Some enclosures (particularly LaCie Rugged and certain WD designs) have the bridge board physically attached to the drive in ways that make amateur removal risky. More importantly, if the bridge board is not actually the problem - if the drive itself has a mechanical or firmware issue - connecting it to a SATA dock will result in the same non-detection. You will not have gained anything but you may have lost the original enclosure that could have provided clues about the failure. If there is any doubt about the cause of non-detection, it is safer to send the drive to MDrepairs for proper diagnosis.
09 Before You Ship
Troubleshooting Steps Before Professional Recovery
Before shipping your drive to MDrepairs, there are a few safe troubleshooting steps you can take to rule out common environmental issues. These steps will not fix a genuine drive failure, but they will help you avoid paying for a diagnostic on a drive that simply has a bad cable or a dead USB port.
Important: these steps assume the drive is not making clicking or beeping sounds. If your drive is clicking, stop immediately and read our clicking drive guide.
For Internal SATA Drives
1. Try a different SATA cable: SATA cables are fragile and their connectors can work loose over time. Swap the cable with one you know works - ideally one that is currently connected to a working drive. Do not just move the existing cable to a different port - replace it entirely.
2. Try a different SATA port: Motherboards have multiple SATA ports and individual ports can fail. Try each available SATA port on your motherboard. Also check your BIOS settings - some SATA ports may be disabled or configured for RAID mode instead of AHCI mode.
3. Try a different power connector: The SATA power connector from your power supply may be faulty. Try a different power cable or a different branch from the power supply. Desktop external drives that use power adapters - try a different adapter if you have one with the same specifications.
4. Listen to the drive: Power on the computer and put your ear close to the drive (or your hand on it to feel vibration). Is the drive spinning? Is it clicking? Is it completely silent? This information is extremely valuable for diagnosis. A drive that spins normally but is not detected is a very different situation from a drive that does not spin at all.
5. Check BIOS/UEFI directly: Enter your BIOS settings during boot (usually by pressing DEL, F2, or F12 during the POST screen) and look at the SATA device list. If the drive appears in BIOS but not in Windows, the issue may be a corrupted partition table, file system corruption, or a driver issue - not a hardware failure. These situations may be recoverable with software tools without professional help.
For External USB Drives
1. Try a different USB cable: USB cables fail more often than you might think, especially the USB-C and micro-USB 3.0 connectors. Use a known-good cable.
2. Try a different USB port: Use a port directly on the motherboard (back of a desktop, built into a laptop) rather than a front panel port, hub, or keyboard port. USB 3.0 drives should be connected to USB 3.0 ports (usually blue).
3. Try a different computer: This is the single most useful test. If the drive works on another computer, the issue is with your computer's USB drivers, ports, or operating system - not the drive.
4. Check Disk Management (Windows): Open Disk Management (right-click Start > Disk Management). The drive may appear here even if it does not have a drive letter. If it shows as "Unknown" or "Not Initialized" with its correct capacity, the drive hardware is working - the issue is a file system or partition problem. If it shows as "No Media" or does not appear at all, the issue is likely hardware.
5. Check Device Manager (Windows): Look under "Disk drives" and "Universal Serial Bus controllers" for any devices with yellow exclamation marks or error icons. Error messages here can provide clues about whether the issue is the USB bridge board or the drive itself.
What NOT to Do
Do not run consumer data recovery software (Recuva, Disk Drill, EaseUS, etc.) on a drive that is not properly detected. These tools require the drive to be visible to the operating system and accessible at the sector level. Running them on a drive with hardware issues - especially one that is intermittently detected - can cause additional damage as the software hammers the drive with read requests that the failing hardware cannot handle. If basic troubleshooting does not resolve the non-detection, the drive needs professional diagnosis.
Do not open the hard drive. Opening a hard drive outside of a certified clean environment exposes the platters to dust particles that can cause head crashes and permanent data loss. There is nothing inside the drive that a non-specialist can repair, and opening it will void any possibility of warranty recovery if the drive is still under warranty.
Do not attempt a PCB swap using a board from another drive or purchased online unless you have micro-soldering equipment and experience transplanting ROM chips. An incorrect PCB swap can cause the drive to overwrite its firmware with incompatible data, turning a recoverable drive into an unrecoverable one.
10 Limits Of Software
When Software Recovery Will Not Work
Data recovery software has its place, but it cannot fix a drive that is not being detected. Understanding the limitation is important because many customers waste valuable time - and potentially make their situation worse - by trying software solutions on hardware problems.
The Fundamental Requirement: The Drive Must Be Accessible
Every data recovery software tool - whether it is free (TestDisk, PhotoRec) or paid (Recuva, EaseUS Data Recovery, Disk Drill, R-Studio, UFS Explorer) - requires the drive to be accessible at the raw sector level. The software sends read commands to the drive and the drive returns data. If the drive is not detected by your operating system, there is no mechanism for the software to communicate with it. Asking recovery software to fix a drive that is not detected is like asking a translator to interpret a phone call that never connected.
Situations Where Software Might Help
If your drive IS detected but not accessible - meaning it appears in BIOS, shows up in Disk Management as "Unknown" or "Not Initialized" with its correct capacity, or mounts but shows as "RAW" or empty - software recovery tools may be able to help. These symptoms typically indicate logical damage: corrupted partition tables, damaged file systems (NTFS, HFS+, ext4, exFAT), accidental formatting, or deleted partitions. In these cases, the drive hardware is working and the data is physically present - the file system metadata that organizes the data has been damaged.
Tools like R-Studio and UFS Explorer can scan the drive sector by sector, recognize file signatures, and reconstruct the directory structure even when the file system is damaged. TestDisk can repair corrupted partition tables and restore accidentally deleted partitions. PhotoRec can carve files directly from raw sectors based on their file signatures.
Situations Where Software Cannot Help
Drive not detected in BIOS: No software can access a drive that does not exist to the system. The drive needs hardware-level repair before any software can interact with it.
Drive shows as 0 bytes or wrong capacity: This is firmware-level corruption that requires PC-3000 service area repair. Software tools see the drive at its reported (wrong) capacity and cannot access the data beyond it.
Drive connects and disconnects rapidly: The drive is not stable enough for software to perform a sustained scan. The constant connection interruptions will cause the software to crash, hang, or produce incomplete results.
Drive detected but extremely slow (seconds per sector): This indicates failing heads or severe bad sector damage. Running software on a drive in this condition will cause thousands of read retry attempts, each one stressing the failing heads and potentially causing platter damage. The drive needs to be imaged using professional hardware (PC-3000, DeepSpar DDI) that can control the read process - timeout settings, retry limits, head selection, power cycling - in ways that consumer software cannot.
SSD not detected: SSD non-detection is always a hardware or firmware issue. Consumer software has no mechanism to repair SSD controller firmware or access raw NAND flash chips.
The Danger of Trying Anyway
When a drive is intermittently detected - appearing for a few seconds before disappearing - customers are often tempted to quickly launch recovery software during the brief window when the drive is visible. This is one of the most damaging things you can do. The software immediately begins hammering the drive with read requests, which stresses the already-failing component (head, firmware, PCB) that is causing the intermittent detection. We have seen drives arrive at MDrepairs that were intermittently detectable when the customer first noticed the problem but became completely undetectable after hours of recovery software attempts. The original failure was treatable; the additional damage caused by the software was not. If your drive is only intermittently detected, power it off immediately and contact MDrepairs. Intermittent detection is a warning sign that the drive is on the edge of complete failure, and every power cycle pushes it closer.
11 Translator Errors
"Wrong Capacity" and "0 Bytes" Issues
One of the most confusing drive failures is when your drive IS detected but reports an impossibly wrong capacity. Your 4TB drive shows as 0 bytes. Your 2TB drive appears as 32MB. Your 8TB NAS drive reports as 8MB. The drive appears in Disk Management, Device Manager may show the correct model number, but the capacity is wildly wrong and no data is accessible.
Why Drives Report Wrong Capacity
The capacity your operating system displays comes from the drive itself - specifically, from the drive's firmware. During initialization, the drive reads its translator tables and identity modules from the service area, calculates its usable capacity, and reports that number to the host controller. If the translator tables or identity modules are corrupted, the drive reports whatever garbled data it can extract - which often results in impossibly small numbers like 0 bytes, 8MB, or 32MB. The significance of these specific numbers is revealing:
0 bytes: The drive's translator table is completely unreadable. The drive cannot map any logical blocks to physical locations, so it reports zero usable capacity. The data is still on the platters but the drive has completely lost its roadmap for finding it.
8MB, 32MB, or other small values: These often correspond to the size of the firmware zone itself. When the translator for the user data area is corrupted, the drive may only report the size of the firmware partition - the only area it can still access. This is essentially the drive saying "I can see my own firmware area but I have no idea where the user data is."
Half the actual capacity (e.g. 2TB drive shows as 1TB): This can indicate a specific translator module corruption that affects only certain head or zone definitions. The drive can map data on some platter surfaces but not others, reporting only the capacity it can account for.
LBA 0 capacity (drive shows as exactly 1 sector): A severe translator or firmware corruption where the drive can identify itself but maps only a single logical block. This is common in certain Seagate firmware failure modes.
How MDrepairs Fixes Wrong Capacity Issues
Wrong capacity issues are firmware-level problems that require the PC-3000 to resolve. The general process involves:
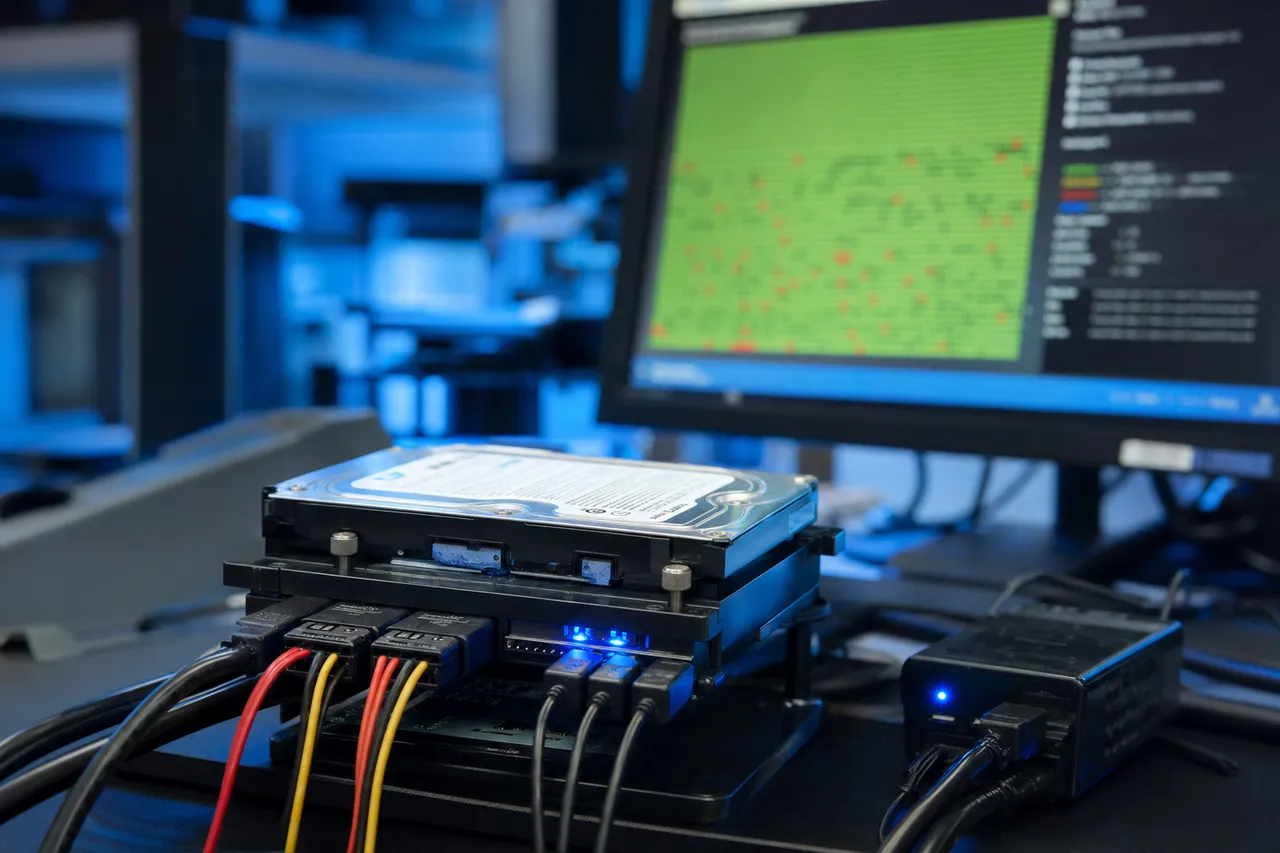
1. Service area access: We connect the drive to the PC-3000 and access the service area directly using manufacturer-specific vendor commands that bypass the normal initialization sequence. This allows us to read the firmware modules regardless of whether the drive successfully completed initialization.
2. Module analysis: We examine each firmware module - translator tables, defect lists, adaptive parameters, identity data - to identify which modules are corrupted and how.
3. Translator rebuild: Using the PC-3000's firmware repair tools, we rebuild the corrupted translator tables. For some drive families, this involves loading a known-good translator template and adapting it to the patient drive's specific parameters. For others, it involves repairing specific corruption points within the existing translator.
4. Capacity restoration and imaging: Once the translator is repaired, the drive reports its correct capacity and the user data area becomes accessible. We immediately image the entire drive to a healthy target, creating a sector-by-sector clone that preserves all data.
This is not a process that any consumer tool can perform. The translator tables are in the service area, which is invisible to normal read/write operations. Only professional hardware with vendor-level command access can reach them.
Can Wrong Capacity Be Caused by Anything Other Than Firmware?
In rare cases, wrong capacity can be caused by a PCB issue - specifically, a ROM chip that has been partially corrupted. The ROM chip stores some initialization parameters that the firmware uses during startup. If the ROM is corrupted, the drive may misidentify its own capacity. This is typically resolved by reading the ROM from the original PCB, repairing the corruption, and either reprogramming the original chip or programming a new one.
Wrong capacity can also be a symptom of head failure on specific surfaces. If the firmware zone spans multiple platter surfaces and one head has failed, the drive may only be able to read part of its firmware, resulting in partial translator loading and wrong capacity reporting. In these cases, a head swap is needed before the firmware can be fully read and repaired.
12 Second Opinion
Data Recovery From Drives That Failed at Other Shops
A significant percentage of the drives we receive at MDrepairs have already been examined - and rejected - by other data recovery companies. The previous shop told the customer the drive was "unrecoverable," "physically destroyed," or "beyond repair." In many of these cases, we successfully recover the data. Here is why.
Why Drives Get Rejected by Other Shops
Misdiagnosis: The most common reason. A drive with firmware corruption gets diagnosed as a head failure because the symptoms look similar - the drive spins but is not detected. The shop opens the drive in a less-than-clean environment to inspect the heads (which are fine), contaminates the drive enclosure with dust particles, and declares it unrecoverable. Or a drive with a PCB issue gets diagnosed as a motor failure because the drive does not spin. The shop does not have the equipment or expertise to test PCB components and gives up.
Lack of equipment: Many data recovery shops do not have professional-grade tools like the PC-3000. Without the PC-3000, firmware repair is essentially impossible - the shop cannot access the service area, cannot read or modify firmware modules, and cannot diagnose firmware corruption. They can perform head swaps (if they have a clean bench) and PCB work (if they have micro-soldering equipment), but firmware issues are completely beyond their capability. Since firmware corruption is one of the most common causes of non-detection, these shops are unable to help a large percentage of customers.
Wrong donor parts: Head swap recovery requires a compatible donor drive - same model, same head count, same firmware revision, and ideally from the same manufacturing batch. Shops with limited donor inventories may attempt a head swap with an incompatible donor, which fails. They then declare the drive unrecoverable, not because the patient drive is damaged beyond repair, but because they used the wrong donor. MDrepairs maintains an extensive donor inventory specifically to avoid this issue.
Damage caused during the previous attempt: This is the most serious scenario. If the previous shop opened the drive in a non-clean environment, installed incompatible heads, performed an incorrect PCB swap without ROM transplant, or powered the drive on with a mismatched donor board, they may have caused additional damage that makes recovery harder - but not necessarily impossible. We have recovered data from drives with contamination, additional head damage, and firmware corruption caused by incorrect repair attempts at other shops.
Our Approach to Previously-Worked Drives
When we receive a drive that has been examined by another shop, we start from scratch. We do not trust the previous diagnosis. We perform our own complete diagnostic - PCB testing, motor analysis, controlled power-on with head monitoring, and PC-3000 firmware analysis. In many cases, our diagnosis differs from the previous shop's assessment, and the actual problem turns out to be something they did not have the tools or expertise to identify.
We are transparent about the situation. If the previous shop caused additional damage, we will tell you - and we will explain how it affects recovery likelihood and cost. If the drive truly is unrecoverable (which does happen, though less often than other shops suggest), we will explain exactly why and we will not charge you beyond the diagnostic fee. No data, no charge.
What to Bring When Sending a Previously-Worked Drive
If you are sending us a drive that was examined by another shop, include as much information as possible about what was done: Was the drive opened? If so, were the heads or PCB replaced? What donor drive was used? Were any firmware repair attempts made? Was the drive successfully imaged at all, even partially? Any documentation from the previous shop - diagnostic reports, photos, communications - is helpful. This information allows us to account for any modifications made to the drive and adjust our recovery approach accordingly.
Do not let a rejection from another shop discourage you from trying MDrepairs. We routinely recover drives that other companies have given up on, particularly drives with firmware issues, encrypted external drives, and drives where the previous shop used incompatible donor parts.
13 Why Us
Why Choose MDrepairs for Undetected Drive Recovery
When your hard drive stops being detected, you need a data recovery lab that can handle every possible cause - from a simple USB bridge board failure to complex firmware corruption to a clean bench head swap. MDrepairs is equipped and experienced in all of these areas. Here is what sets us apart.
PC-3000 Professional Recovery System
The PC-3000 by ACE Laboratory is the gold standard in professional data recovery hardware and software. It provides direct access to the service area firmware of drives from all major manufacturers - Seagate, Western Digital, Toshiba, HGST, Samsung, Maxtor, and more. When your drive is not detected because of firmware corruption, the PC-3000 allows us to bypass the normal initialization sequence, access the corrupted modules directly, repair them, and bring the drive back to a functional state for imaging.
The PC-3000 also provides professional-grade imaging capabilities that no consumer software can match. We can configure timeout parameters, retry limits, head disable maps, read direction, and power cycling schedules to extract the maximum amount of data from a failing drive without causing additional damage. For drives with degraded heads or extensive bad sectors, the PC-3000's adaptive imaging algorithms automatically adjust read parameters in real time to optimize data yield.
Certified Clean Bench Environment
Any recovery that requires opening the hard drive - head swaps, platter transplants, motor work, or even physical inspection - must be performed in a particle-controlled environment. Our clean bench provides ISO-standard laminar airflow that prevents dust particles from settling on exposed platter surfaces. Opening a hard drive on a regular workbench exposes the platters to airborne particles that are larger than the fly height of the read/write heads, which can cause immediate head crashes and permanent data loss.
Extensive Donor Drive Inventory
Head swap recovery requires a compatible donor drive. Compatibility is not just about matching the model number - it requires matching the head count, firmware revision, and often the manufacturing date. MDrepairs maintains a continuously updated inventory of donor drives across all major manufacturers and models. This allows us to begin head swap recovery quickly without waiting days or weeks for a compatible donor to arrive.
Transparent Process with 2M+ Social Proof
MDrepairs is not a black box. Joseph Montanti shares real data recovery cases - including drives that were not detected, firmware repairs, head swaps, and PCB work - with over two million followers on YouTube, TikTok, and Instagram. You can watch actual recoveries of drives with the same symptoms as yours before you even ship your drive. This level of transparency is unmatched in the data recovery industry and it is the reason thousands of customers trust us with their irreplaceable data every year.
No Data, No Charge Policy
If we cannot recover your target files, you pay only the $100 diagnostic fee. You never pay for a failed recovery. This policy exists because we believe you should not bear the financial risk of a recovery attempt - we should. Our confidence in our success rates is reflected in this policy: we would not offer it if we were not consistently delivering results.
Nationwide Service via Secure Mail-In
You do not need to be in New Jersey to use MDrepairs. The majority of our customers ship their drives from across the United States. We provide free insured shipping labels, your drive is tracked at every step, and your recovered data is shipped back on a new external drive with free insured return shipping. The entire process - from shipping your drive to receiving your data - typically takes 7 - 14 days for standard service.
Frequently Asked Questions
Straight answers on why drives stop being detected, what it costs, and how we get your data back - drawn from the questions we hear every day.
-
Why is my hard drive not detected?
A hard drive can stop being detected for many reasons: PCB (circuit board) failure, firmware corruption in the service area, read/write head failure preventing firmware initialization, USB bridge board failure in external drives, seized spindle motor, or a blown TVS diode. The drive's data is usually still intact on the platters - the drive simply cannot communicate with your computer. A $100 professional diagnostic at MDrepairs identifies the exact cause.
-
My hard drive is not showing up in BIOS. Is the data gone?
Not necessarily. A drive that does not appear in BIOS has failed to complete its power-on initialization sequence, but this does not mean the data is destroyed. Common causes include a dead PCB (often a blown TVS diode that can be removed or replaced), firmware corruption that prevents the drive from identifying itself, or head failure that blocks firmware reads. MDrepairs recovers data from drives in this condition regularly.
-
How much does it cost to recover data from an undetected drive?
Cost depends on the cause. USB bridge board bypass or TVS diode repair: $650 - $1,200. Firmware corruption repair: $650 - $1,200. Head swap for mechanical non-detection: $1,000 - $2,000. Severe cases with platter damage: $999 - $2,500+. Every case starts with a $100 diagnostic that is applied toward the recovery cost. No data, no charge.
-
Can I recover data myself from an undetected drive?
If the drive is not detected at all, no. Consumer data recovery software requires the drive to be visible and accessible to the operating system. If the drive appears in Disk Management with its correct capacity but shows as RAW or uninitialized, software tools like R-Studio or TestDisk may help. If the drive is not in Disk Management at all, or shows wrong capacity, professional recovery is needed.
-
My external hard drive stopped being recognized. What should I do?
First, try a different USB cable and a different USB port directly on your computer (not a hub). Try a different computer if possible. If the drive still is not recognized, the most common cause is a failed USB bridge board inside the enclosure - the hard drive itself is likely fine. Do not open the enclosure yourself, especially for Western Digital drives that use hardware encryption on the bridge board. Contact MDrepairs for a diagnostic.
-
Can you recover data from a drive that shows 0 bytes?
Yes. A drive showing 0 bytes or a wrong capacity (like 32MB on a 4TB drive) almost always has corrupted firmware translator tables. The data is still on the platters - the drive has lost its internal roadmap for locating it. MDrepairs uses the PC-3000 to access the service area, rebuild the translator tables, and restore access to the full data area. This is one of our most common recovery types.
-
Why does my drive keep connecting and disconnecting?
Rapid connect/disconnect cycling is typically caused by a failing USB bridge board, a bad USB cable, or insufficient power from the USB port. Try a different cable and a port directly on your computer first. If the problem persists, the bridge board is likely failing. Do not keep trying - the repeated connection attempts can stress a drive that may also have a developing mechanical issue.
-
My drive spins but is not detected. What is wrong?
A drive that spins normally but is not detected typically has firmware corruption or a partial head failure. The motor and mechanical components are working, but the drive cannot read its initialization data from the firmware zone on the platters. These cases generally have high recovery rates because the platters are undamaged. The PC-3000 can diagnose and often repair the firmware issue directly.
-
My drive does not spin at all. Is the data gone?
A non-spinning drive does not mean lost data. Common causes include a blown TVS diode on the PCB (prevents power delivery), a failed motor controller chip, seized spindle bearings, or a dead USB bridge board. In many cases, PCB repair or bridge board bypass gets the drive spinning again and the data is fully intact. Seized motors may require a platter transplant.
-
Should I try swapping the PCB from another drive?
No. Every hard drive PCB contains a ROM chip with unique calibration data specific to that individual drive. Swapping PCBs without transplanting the ROM chip can cause the drive to overwrite its firmware or damage the platters with misaligned heads. If you need PCB repair, send the drive to MDrepairs where we perform ROM transplants as a routine procedure.
-
What is the Seagate BSY bug?
The BSY (busy) bug affected Seagate Barracuda 7200.11 and DiamondMax 22 drives manufactured 2008 - 2009. A firmware defect caused a module to grow until it corrupted adjacent modules, preventing the drive from completing initialization. The drive spins but enters a BSY state and is never detected. MDrepairs resolves BSY issues by accessing the drive's terminal interface and repairing the corrupted firmware modules with the PC-3000.
-
My SSD is not detected. Can you recover it?
Yes, though SSD recovery is more complex than HDD recovery. SSD non-detection is typically caused by controller chip failure, firmware corruption, or NAND flash degradation. MDrepairs uses specialized SSD recovery tools including the PC-3000 SSD module to repair firmware or read raw NAND chips directly. Success rates vary by controller type and whether the drive uses encryption.
-
How long does recovery take for an undetected drive?
Standard turnaround is 5 - 10 business days from the time we receive your drive. Priority service (3 - 5 days) is available for +$250, Rush service (1 - 3 days) for +$500, and Emergency same-day service for +$1,000. Simple cases like bridge board bypass may be completed faster. Complex cases involving head swaps or firmware rebuilds typically take the full standard window.
-
Will you need to open my hard drive?
It depends on the cause of non-detection. PCB repair, firmware recovery, and USB bridge board bypass do not require opening the drive - the platters remain sealed. Head swap recovery and motor repair do require opening the drive in our certified clean bench environment. We never open a drive unless the diagnostic confirms it is necessary.
-
My WD external drive has hardware encryption. Can you still recover it?
Yes. Western Digital uses hardware encryption on many external drive bridge boards (My Passport, My Book, Elements, Easystore). When the bridge board fails, we must either repair the original board, transplant the encryption key chip to a compatible board, or extract the key for decryption after imaging. MDrepairs maintains an inventory of WD bridge boards across hardware revisions for this purpose.
-
What is a TVS diode and why does it keep coming up?
A TVS (Transient Voltage Suppressor) diode is a tiny component on the hard drive's PCB that acts as a built-in surge protector. When it detects a voltage spike, it short-circuits to protect the rest of the board. The short circuit saves the drive but also blocks all power flow, making the drive appear dead. Removing or replacing the shorted TVS diode often restores the drive immediately. It is one of the most common and least expensive fixes we perform.
-
Can a bad SATA cable cause a drive to not be detected?
Yes. SATA cables are fragile and their connectors can work loose over time. A bad cable can cause intermittent detection, complete non-detection, or slow speeds. Before assuming drive failure, try a known-good SATA cable and a different SATA port on your motherboard. This is the first thing to rule out for internal drives that stop being detected.
-
My drive failed at another data recovery shop. Can you help?
Yes. We regularly recover drives that other shops declared unrecoverable. Common reasons for previous failure include misdiagnosis (firmware issue mistaken for mechanical failure), lack of PC-3000 equipment for firmware repair, incompatible donor parts for head swaps, or damage caused by the previous attempt. We start from scratch with our own diagnostic. No data, no charge.
-
Is it safe to ship my hard drive for recovery?
Yes. We provide free insured shipping labels and specific packing instructions. Wrap the drive in anti-static material, surround it with bubble wrap or packing material, and ship it in a sturdy box. Do not use packing peanuts directly against the drive. We receive drives from across the United States daily and shipping damage is extremely rare when packed properly.
-
What is the PC-3000 and why does it matter?
The PC-3000 by ACE Laboratory is the industry-standard professional data recovery system. It provides direct access to hard drive and SSD firmware, service area modules, and factory-level commands that are inaccessible to any consumer tool. For undetected drives, the PC-3000 is essential - it can bypass normal initialization, access corrupted firmware, repair translator tables, and image drives with failed heads using selective head maps. Most data recovery shops that reject drives do so because they lack this equipment.
-
Can a power surge cause a hard drive to stop being detected?
Absolutely. Power surges are one of the most common causes of drive non-detection. The surge typically blows the TVS diode on the PCB (best case) or damages the motor controller chip, preamplifier, or ROM chip (worse cases). Using a surge protector or UPS for important drives is strongly recommended. If your drive stopped being detected after a power event, PCB repair is the likely solution.
-
My NVMe SSD disappeared from my system. What happened?
NVMe SSD non-detection is typically caused by controller failure, firmware corruption, or NAND flash degradation. Some NVMe drives also overheat under sustained workloads, causing thermal throttling and eventual controller failure. Check that the M.2 slot supports NVMe (not just SATA M.2) and try reseating the drive. If it is still not detected, professional recovery is needed.
-
Do you recover data from RAID arrays where drives stopped being detected?
Yes. RAID arrays are particularly vulnerable to non-detection issues because the failure of even one drive can make the entire array inaccessible. We recover data from RAID 0, RAID 1, RAID 5, RAID 6, and RAID 10 configurations. We repair the individual failed drives first, image them, and then reconstruct the RAID array from the images. Call 732-933-7717 for RAID recovery pricing.
-
Will the $100 diagnostic tell me exactly what is wrong?
Yes. Our diagnostic includes PCB electrical testing, motor current analysis, controlled power-on with head monitoring, and PC-3000 firmware analysis. You receive a detailed report explaining the exact cause of non-detection, the specific repair needed, recovery likelihood, expected data yield, timeline, and a firm price quote. No surprises.
-
What happens if you cannot recover my data?
If we cannot recover your target files, you pay only the $100 diagnostic fee. No data, no charge. We return your drive and provide a detailed explanation of why recovery was not possible. In our experience, most undetected drives are recoverable - non-detection is often caused by fixable issues like firmware corruption, PCB damage, or bridge board failure rather than catastrophic platter damage.
Ready to Recover Your Data?
$100 professional diagnostic on every case. No data, no charge. Free insured shipping nationwide.